Heinz-Jürgen Zamzow, Science Journalist
Automated microscopes can help speed up the industrial quality-control process, saving time and money.
Time is money when it comes to industrial work flows, and efficiency is a key priority. This is especially true with regard to one of the SGS Institute’s most recent projects: quality control of carbon-fiber reinforced polymer (CFRP) parts for the new BMW i3 electric car, which has since gone into production.
The Geneva-based SGS Group offers testing and certification of a wide variety of parts and products of different shapes and sizes. Its subsidiary, SGS Institut Fresenius GmbH of Dortmund, specializes in the automotive, aerospace and medical technology sectors, and employs a range of methods for detailed inspection of materials and parts.
As part of the quality-control process for the automotive sector, some 300 micrographs of CFRP must be prepared and examined in detail before an initial sample can be approved. A reliable assessment of the micrograph requires a complete image, which previously was accomplished at higher magnifications using a microscope to capture about 20 single frames, which were manually compiled to create the full image. This cumbersome process was time-consuming, with each micrograph taking between 15 and 20 minutes to compose.

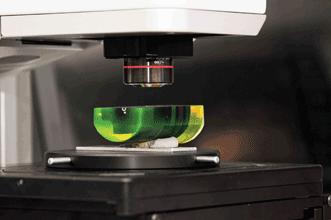
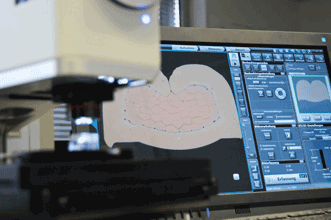
A micrograph is prepared by placing a sample under an Olympus DSX500 microscope, where images are automatically captured according to a preselected grid pattern. Images courtesy of Lutz Ruminski, Bremen, Germany.
To transform this process, SGS turned to the Olympus automated DSX500 microscope, and with this tool, the time of micrograph production has been reduced to about five minutes. This means that jobs can be handled more quickly than before, helping the company to meet customer deadlines, which often can be very tight. Also, with the reduction in preparation time, highly qualified staff can focus instead on the important job of evaluating the images.
Simplicity of operation and automated image stitching have enabled these advances. The microscope works with an astonishing degree of accuracy when overlaying individual images, and – unlike with other microscopes – single frames must no longer be defined manually; they now can be produced with a motorized table controlled by a fully automated, high-precision fine-adjustment mechanism. The mechanism can even handle very regular structures, such as memory chips, where multiple locations are repeated and it is difficult to determine where the first frame ends and the next begins, even at high magnifications.

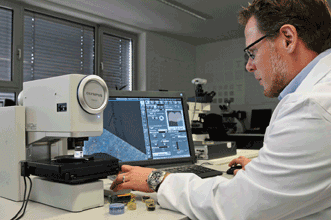
SGS analyst Markus Ridder places a micrograph beneath the Olympus DSX500 microscope, bringing the desired detail of the image into focus.
Users benefit from improved ease of use, as the microscope generates a selection of preview images from which they can choose the most suitable imaging method. To have the microscope select the method automatically, users can choose the necessary parameters without having to input additional information. Users are never in danger of losing orientation on the specimen, even when the image is reduced in size or enlarged, as the Macro Map function always displays the viewpoint on-screen. Inspection is also facilitated with a 13× optical zoom and a 30× digital zoom.
The technology is especially useful in everyday quality assurance, according to the team at SGS. For example, it routinely investigates very homogeneous-looking micrographs of turbine blades from aircraft engines for potential material inclusions. When the magnifications are relatively high, it is not very challenging for a metallographer to hunt for possible irregularities, and the microscope’s user interface also enables fast configuration for efficiently detecting material faults. Specialized functions, such as the microscope’s high dynamic range and the proprietary WiDER algorithm, provide options for inspecting objects with defects or extreme differences in reflectance. The automatic system allows essentially any staff member to switch samples and capture images; all the material experts have to do is evaluate the images. This presents yet another way in which microscopy can enhance efficiency, especially within the routine testing of large numbers of material samples, providing a competitive edge for the laboratory.

This metallographic microsection of a crimp connector for electrical cables can help a metallographer look for defects.
The microscope’s LED illumination allows bright-field and dark-field observation methods to be combined, enabling the easy detection of defects or irregularities. The differential interference contrast (DIC) function allows uneven surfaces to be analyzed for defects or irregularities down to the microscale.
A customer in the dental technology field commissioned SGS to analyze material separation between two plastic parts, and the DIC function enabled highly informative images for this application. The function’s superhigh dynamic range produced crisp images with a single screen tap, even from DIC and dark-field images. DIC is not new in itself, but enhancement with optodigital technology really opens up new perspectives.
Meet the author
Heinz-Jürgen Zamzow is a scientific journalist based in Berlin; email: [email protected].