HOLLY O'DELL, CONTRIBUTING EDITOR
To protect drivers and meet government requirements, automotive manufacturers require 100% inspection of every product that leaves a supplier’s facility. Furthermore, inspections have become more sophisticated. Oakley Industries, a just-in-time (JIT) supplier of tire and wheel assemblies based in Flint, Mich., recently installed the LEONI Wheel & Tire Validation System in two of its plants. The system applies a multitude of complex inspections for quality and identification verification to validate each assembly in as little as 1 to 2 seconds, while delivering a 99.7% inspection accuracy rate.
LEONI’s wheel and tire inspection validates that the model/style/tread pattern and the wheel/rim assembly are all correct for the build sequence provided by the Oakley assembly plant.
To create this system, LEONI began with a set of vision libraries and developed an application using multiple algorithms. These algorithms interrogate or validate specific characteristics. These characteristics are necessary to qualify that the target component — in this case, the wheel, tire, and complete wheel and tire assembly — is confirmed for compliance and
accuracy.

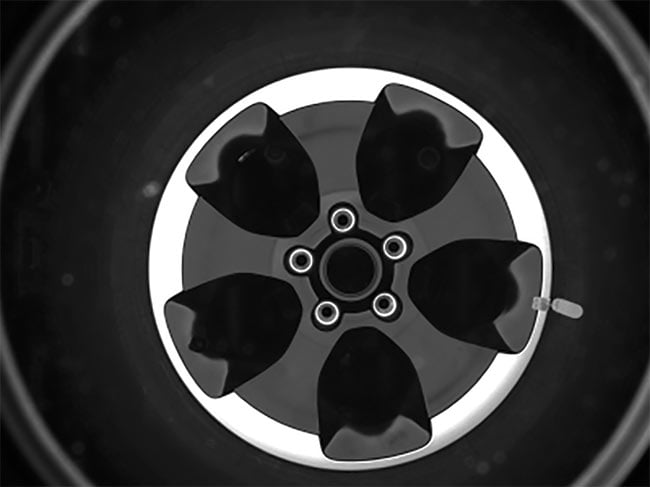
Wheel inspection includes evaluations of features such as style, color, diameter, and gloss finish. Courtesy of LEONI Engineering Products & Services Inc.
The result is a production-ready, semimodular standard product that uses machine vision technology and supports a library of more than 100 unique wheel and tire models and combinations to perform a multitude of functions that prevent mismatched wheels and tires.
“The industry is looking for accuracy beyond simply confirming the correct tire on the correct rim,” said Andy Reed, sales engineer at LEONI Engineering Products & Services Inc. (LEPS).
“Our validation system accurately and reliably performs inspections defined by the end user on each tire and wheel assembly, even down to the smallest detail.”

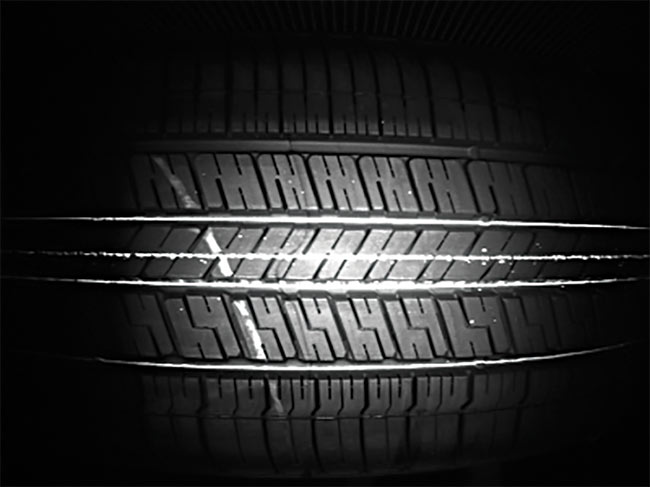
When the vision system identifies an error on a tire, such as the scratch mark shown, the tire is immediately ejected from the line. Courtesy of LEONI Engineering Products & Services Inc.
The inspection system looks for defects such as discoloration and missing components. On the wheel specifically, the system validates features including style, diameter, and center cap color and orientation. Additionally, the validation system evaluates multiple patterns — for example, five standard spokes or honeycomb — and also verifies a color to 12 shades, identifies custom markings and shadings, and can detect several levels of gloss.
The system can also be customized to verify important information on the tire sidewall, including tire type, width, tread pattern, aspect ratio, construction, rim or bead diameter, brand name (often printed with black-on-black raised or recessed lettering), DOT code, and service description, which indicates the tire’s load index and speed symbol.
Another inspection involves match mark alignment. This inspection occurs by measuring the distance from the wheel sticker to the tire paint dot or sticker. The alignment is critical to offset tire forces with wheel runout.
The LEONI system inspects a broad range of characteristics and does so rapidly and accurately. In fact, Oakley averaged about 2.3 seconds for overall inspection time for each tire and wheel assembly, from point of trigger to decision, with some inspections taking only 1.2 seconds. Competing inspection systems can take up to 5 or 6 seconds. At the outset of the project, LEPS committed to an inspection accuracy rate of 99.4% but delivered 99.7%.

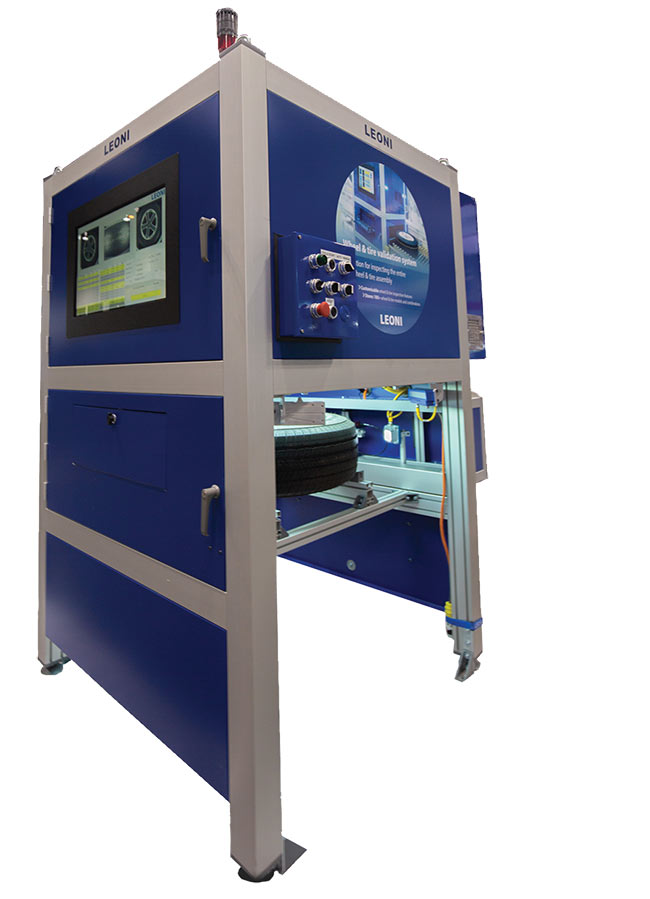
The LEONI validation system spends an average of 2.3 seconds inspecting a tire and wheel. Operators use the intuitive panel on the side of the system to verify that all inspection parameters are met. Courtesy of LEONI Engineering Products & Services Inc.
The shorter cycle times and improved throughput appealed to Oakley because, as a JIT supplier, the company has only 2.5 to 5 hours of lead time to assemble and validate wheel and tire combos before shipping them to the automaker’s facility for installation.
Through data reported by the inspection system and offered to automotive engineers, Oakley stops recognized defects from leaving assembly plants and ending up at customer sites. Data reporting also provides an audit trail to show that tires and wheels were inspected within specification and that they are clear of defects should a customer consider the product questionable or defective. “There is absolutely no room for error,” Reed said.