An increasing demand for aspheres and freeform optics means that manufacturers must come up with evermore ingenious ways to measure the nonuniform lens.
Automobile cameras, telescopes, head-mounted displays, laser-focusing heads and other modern photonic devices incorporate high-grade optics that can perform under extreme environmental conditions. The demand for such lenses means they must be reproduced with the utmost accuracy, placing stringent requirements on lens measurement.
While the industry has a mature toolset for evaluating rotationally invariant aspheres, the technologies that pertain to freeform surface metrology are relatively immature. This leaves much room for innovation and disruption.

Corning’s aspheres often have departures over 100 µm, with figure requirements of λ/100 as well as tight midspatial frequency control. Producing lenses with such surfaces requires suitable metrology such as full-surface stitching interferometry. Courtsey of Corning.
Over the last five years, metrology has departed from simple two-dimensional tactile measurement to noncontact three-dimensional metrology of aspheres, freeforms and modified geometries such as off-axis torics.
“Current applications are calling for tighter and tighter specifications and tolerances, making greater demands on lens metrology,” said Andrew Fisher, an optical engineer at Edmund Optics Inc. of Barrington, N.J. “Aspheres are quickly becoming more popular, and measuring them to tight accuracies is not trivial. This has pushed the metrology manufacturers to become more clever and innovative in their machine offerings.”
As if unconventional surface shapes weren’t enough to tackle, lenses are also becoming more extreme in size, from shrinking lenses in cameras for mobile devices to large-scale lenses — especially large cylindrical lenses and plano mirrors, some with lengths of up to two meters. These are required today for laser annealing and laser liftoff systems used in modern display manufacturing.

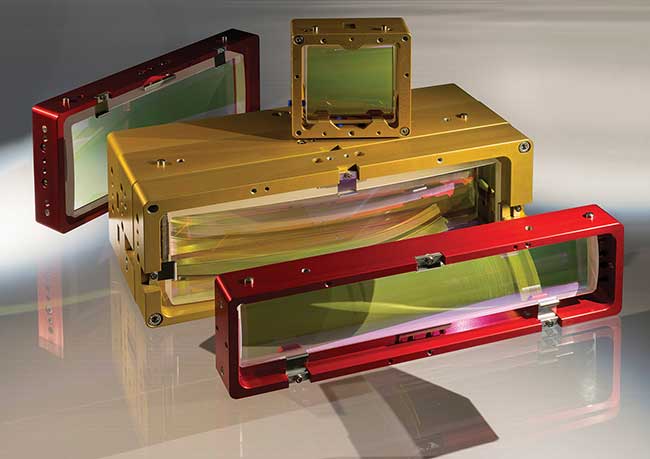
Cylindrical lens elements mounted as single elements and as a multi-element system. Such cylindrical optics are used for high-power laser beam shaping. Sophisticated metrology is needed to determine the surface form accuracy using CGH (computer-generated holography) and stitching technology, as well as for high-grade centering and qualification of the lens coating. Courtesy of Berliner Glas Group. Mounted prism systems for combining eight laser sources, which are provided through cylindrical optics systems.
“Such large optics outside astronomical applications have not been conceivable in the past,” said Rainer Schuhmann, manager of Metrology, Software, Electronic Development and Optical Design at Berliner Glas KGaA Herbert Kubatz GmbH & Co. of Berlin. “Overall, availability of high-grade metrology is the main condition for manufacturing all highly sophisticated optics today. Due to the change of lens dimensions, new applications, new surface forms and new systems designs, there are increasing demands for production and qualification, which require new metrology techniques as the main enabling technology.”
Ideally, measurement systems will be noncontacting so that mounted lenses and hybrid systems of lenses with mechanical interfaces can be tested as assemblies. If lenses are to be understood not only as single elements but as complex systems such as camera objectives or lens arrays, additional challenges concerning the qualification of their functions arise.
“Functions of large cylindric modules as line beam systems as well as telecentric and anamorphic systems require elaborate test setups,” Schuhmann said. “Small optics down to micro-optical systems [that] reach diffraction limitations have to be considered. We are on a good way to provide all needed metrology technology.”
Tolerancing freeform optics
Finding cost-effective and accurate methods of measuring lenses with complex geometries is a major hurdle that metrology suppliers have begun to address and will continue to over the next several years.
“Determining the best methods to measure and tolerance freeform optics is currently a ‘hot’ item today,” Edmund Optics’ Fisher said. “Because of their unique and sometimes unconventional surface shapes, for freeforms it is difficult to create a single, simple metrology system.”
Although in some ways 2D is still the industry standard, experts predict that 3D will soon be its replacement. With this shift, new technologies emerge that enable complex measurements, including the QED Aspheric Stitching Interferometer (ASI); the Mahr Tilted Wave Interferometer (TWI); the Taylor Hobson LuphoScan; and the OptiPro UltraSurf.
“One such advancement has been the introduction of multiwavelength interferometry into versatile metrology systems,” Fisher said. “This is well-demonstrated in the LuphoScan instrument. This technology makes 3D measurements of unique aspheric surfaces possible in just several minutes.”
Other promising techniques involve multiple overlapping subaperture measurements over large components, which is known as stitching interferometry and is combined with computer software to reconstruct the wavefronts. Rapidly emerging as an alternative to standard interferometry, stitching interferometry, stitching interferometry with aberration compensation, and point-scanning systems are providing lens manufacturers with the ability to push aspheres to higher departures and with improved measurement accuracy.
Corning Advanced Optics in Fairport, N.Y., is leveraging its experience with full-surface stitching interferometry testing to provide rapid and accurate measurements.
“We have seen a need to industrialize our asphere metrology capability and make it an integrated part of our optics shop,” said Mark Krol, technology director of Corning Advanced Optics. “What was once a specialized operation is now an everyday task with rapid setups and changeovers. Our aspheres often have departures over 100 µm, with figure requirements of λ/100 as well as tight midspatial frequency control.”
At Mahr GmbH, a metrology specialist based in Göttingen, Germany, demand for aspheric lenses has come from a large range of applications that are found not only in low-cost consumer systems such as cameras, but also in high-performing scientific instruments.
“Producing lenses with increasingly complex surfaces requires suitable metrology. Equipment that was used for spheres, like laser-based standard Fizeau interferometers, simply cannot measure aspheres without holograms,” said Franz Reischer, Mahr’s global product manager of marketing, optical metrology.
The company’s MarOpto TWI 60 is the first example of tilted wavefronts within an interferometer.

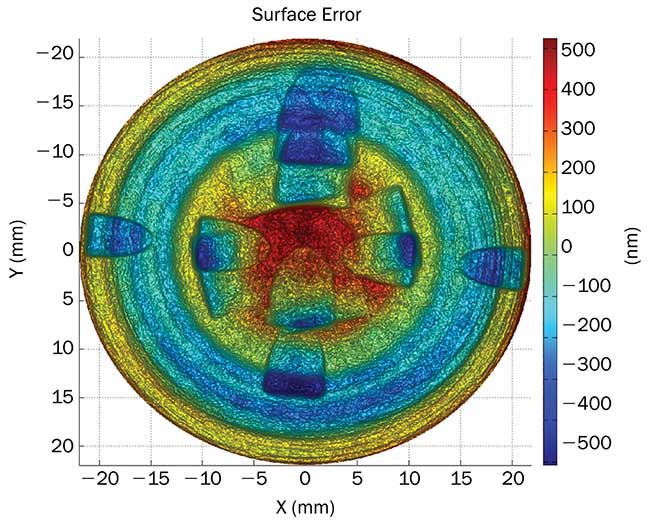
The surface error map of an Asphero 5 demo lens, measured by MarOpto TWI 60. Courtesy of Mahr GmbH.
It offers noncontact full surface metrology in less than 30 seconds without the need for stitching or computer-generated holography; it was named a finalist in the 2015 Prism Awards for Photonics Innovation.
In the setup, the TWI extends the single spheric wavefront of a standard interferometer to an array of mutually tilted wavefronts. The wavefronts simultaneously impinge onto the surface under test (SUT). Thus for each area on the SUT, there is a fitting wavefront that compensates the local deviation from the best-fitting sphere such that the laser light reaches the camera and produces interference fringes that contain the desired surface shape information.

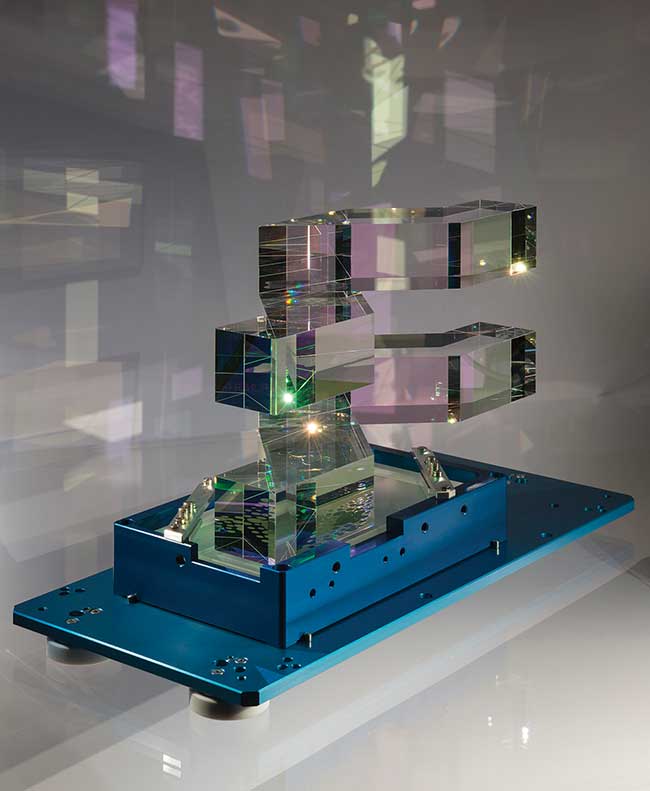
During the alignment and bonding process, the tilt of the prism surfaces is measured using electronic autocollimators with high angular resolution. Courtesy of Berliner Glas Group.
Since all wavefronts are there simultaneously, the SUT can be measured very quickly with high accuracy. Important results can also be obtained by evaluating high- and mid-spatial-frequency errors, as well as coma, an aberration that can be created during the polishing process.
“Such high acquisition speed allows more accurate asphere production,” Reischer said, “as the polishing machine does not drift during the very short measurement and can therefore perform the right correction according to measurement.”
Camera Lenses Under Scrutiny
In case you haven’t noticed, cameras are everywhere. From consumer electronics, government surveillance and home surveillance to automotive control systems and virtual reality, cameras have become ubiquitous in recent years.
Healthy demand means that lenses and imaging systems are appearing in industries that previously could not afford these technologies. The automotive industry is a prime example, as cameras are enabling enhanced safety features and driving the development of autonomous vehicle control systems.
In the past, the sensor in a camera assembly was what ultimately limited the imaging performance of the system. However, sensor technology has changed substantially over the past decade, and the combination of smaller pixels, larger sensor formats and broader spectral sensitivities means that the burden of imaging performance at the camera level is being pushed back onto the lens.
“This makes lens testing and characterization even more important factors in achieving the optimal system level performance,” said Hillary Balonek, IQ Lab Services manager responsible for in-house lens and camera testing at Optikos Corp. of Wakefield, Mass. “This is especially true for shortwave-infrared (SWIR) and midwave-infrared (MWIR) systems, which are of particular interest in the defense industry.”
New applications for imaging systems in the SWIR/MWIR wavebands are constantly emerging, and the cost of SWIR and MWIR sensors, while still significant, has been slowly decreasing as new technologies arise and manufacturing methods improve. This makes SWIR and MWIR cameras more common. And it has led to increased interest in testing lenses in the SWIR and MWIR wavebands.
Similarly, high-volume production of longwave-infrared (LWIR) lenses and cameras is poised to take off, as new commercial applications for thermal imagers emerge.
With lenses increasingly used in applications that go beyond the intent of the original lens design, testing of these lenses is changing. Although the same imaging quality metrics are of interest — resolution, distortion, field curvature, chromatic aberrations and so on — the real goal is to see how the nominal values of these metrics change when the lens is subjected to challenging conditions.
To establish where the true performance limits lie, it’s important to understand how an off-the-shelf lens performs when it has been built into a product that will operate outside and in real-world conditions.
“Knowing how stray light from diffuse, bright landscapes and from bright sources like the sun affects the resolving power of the lens is crucial to the success of the product,” Balonek said. “Another important measurement to make may be testing large populations of lenses to investigate lens-to-lens variation due to manufacturing tolerances.”
There is a lot of interest lately in testing lenses over temperature, especially over the last year or so. The change in focus relative to the mounting flange of the lens over temperature is usually the most important parameter to measure. But measuring the overall imaging performance of the lens over temperature can also be informative.
This is important for any lens that might be subjected to a range of temperatures, and can either help characterize the thermal behavior of a lens or confirm the performance of an athermal design.
Another interesting challenge is the benchmarking of virtual reality/augmented reality-based products and other immersive systems that interface with human vision.
“These products are equally dependent on the software and the optics to provide a truly immersive experience, and lens testing for these systems will have to account for variation in how users perceive their surroundings,” Balonek said. “This is less of a technological challenge and more of a testing process development challenge, especially when VR/AR products are produced in high volume.”