A mature image-processing library enables OEMs to develop fast, accurate and flexible application software for sorting microassembly components and for multiple-camera inspection of high-volume circuit boards.
Sarah Sookman, Matrox Imaging, Harefield, UK
To sort electronic components, an operator typically places the parts into a vibratory bowl feeder. When the bowl is switched on, the parts jiggle and separate themselves on the ridges machined on the inside of the walls. Microassembly components, however, are tiny and almost weightless and usually have too little mass for successful vibration transport. Robotic systems or manual methods often lack sufficient speed or accuracy to feed, sort and inspect.
With these problems in mind, IMS BV of Almelo, the Netherlands, developed the Vision Inspection Feeding System (VIFS) to fulfil those roles. An operator creates a template with a specific part that falls within tolerance, and thereafter the camera acquires images of the parts on the inspection stage. The software, which is based on the Matrox Imaging Library, locates and measures the features of each part, and, to keep them out of the assembly, tags any parts that fail the inspection.
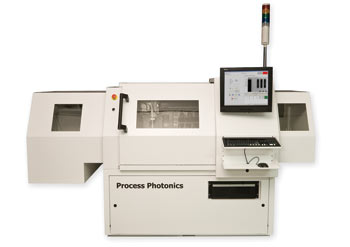
The inspection of panel- and sheet-based circuit boards for the electronics and medical markets presents serious challenges. These industries necessitate high resolution, high throughput and high accuracy because defective components could incur high-cost claims against the supplier. Process Photonics Inc. of Ottawa, Ontario, Canada, designed ProVision, a system that combines vision with integrated materials-handling automation for high-volume production.
With five cameras and three Matrox Odyssey XCL vision processor boards operating in parallel, ProVision acquires images at a resolution better than 5 μm and implements algorithms to make highly precise and accurate measurements. The machine’s architecture enables real-time image acquisition, processing and analysis of multiple parameters per object, at more than 60 parts per second. The whole system is scalable to higher resolution and throughput.
Software library
Both the VIFS and ProVision systems perform complex vision recognition and inspection functions that require a high-level software tool. They also must interface with cameras and, in the case of ProVision, must support multithreading and be able to program vision processors for optimal performance. Both applications feature the Matrox Imaging Library, a high-level programming library with an extensive set of optimized functions for industrial imaging applications.

The ProVision system can handle sheets or panels measuring up to 530 × 635 mm. The load stack is located in the bay on the right, while the unload and reject trays are located in the bay on the left. Images courtesy of Process Photonics Inc.
When it was first launched in 1993, the Matrox Imaging Library was the first hardware-independent software library for imaging applications. All Matrox Imaging hardware products — frame grabbers, vision processors and embedded systems — support the library’s common application programming interface.
The library includes an extensive set of optimized functions for image capture, image processing (for example, point-to-point, statistics, filtering, morphology, geometric transformations, fast Fourier transformations and segmentation), pattern recognition, registration, blob analysis, edge extraction and analysis, measurement, metrology, character recognition, 1- and 2-D code reading, calibration, graphics, image compression, display and archiving. The earliest functionality included image processing, blob analysis and optical character recognition modules. As computing power has increased, later versions of the library have included more complex algorithms for feature-based pattern recognition, feature-based character recognition and for metrology.

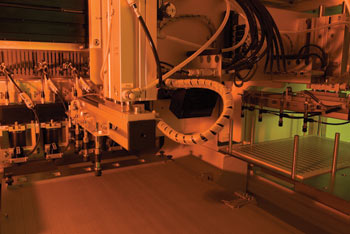
The loader is poised above the load stack of sheets. A second pick-up head at the extreme right is used for simultaneous loading and unloading of sheets.
Electronics inspection is just one of several types of applications that rely on complex algorithms to locate edges, to determine features and to detect surface defects. In the VIFS, for example, the Matrox Imaging Library’s Geometric Model Finder and Metrology modules play significant roles.
The Geometric Model Finder tool can locate a part in any position or orientation; those coordinates then are passed to the Metrology module for measurement of the part’s dimensions and tolerances with an accuracy of ±0.01 mm. These operations are very complex and processing-intensive. In the case of ProVision, the system performs several binarization and blob analysis operations before performing measurements on the parts. The five high-resolution cameras generate so much image data that it requires three vision processor boards with embedded CPUs to take care of the image-processing tasks, freeing the host PC to control the other tasks in the application.

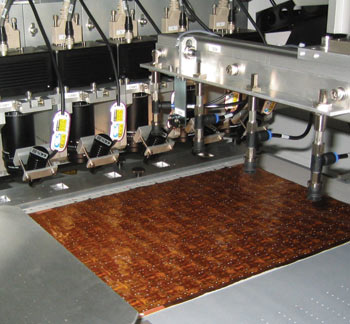
A flexible printed circuit panel is located on the vacuum platen, in front of the five inspection cameras and LED light sources.
Matrox Imaging products help both IMS and Process Photonics differentiate their products from those of their competitors. IMS says that most feeder systems cannot offer the same combination of accuracy, speed and flexibility as the VIFS. Bowl feeders are not reliable enough to meet the challenges of microassembly, and IMS has made the VIFS a standard product for the microassembly industry.
Likewise, scalability is important for Process Photonics’ customers. With the Matrox Imaging Library software architecture, the through- put of the system can be doubled by adding additional cameras and Matrox Odyssey XCL boards. Finally, ProVision’s combination of vision and nonvision components in a small footprint is simply not available in competitors’ products. The company plans to apply its vision technology to printed circuit board defect inspection and to inspection of laser-drilled holes in printed wiring boards.
What’s next?
A new release of the Matrox Imaging Library is planned for 2008. In addition to support for 64-bit operating systems, this version will incorporate optimization for multicore CPUs and for multi-CPU architectures and high-performance computing clusters. The new release will offload and accelerate certain functions to a graphics processing unit to free up the host PC’s resources, and it will feature colour analysis and 3-D calibration and reconstruction tools.
Contact: Sarah Sookman, Matrox Imaging; fax: +44 1895 827 301; e-mail: [email protected].