Three applications exhibit how advancements in machine vision software and preprocessing are multiplying the capabilities of 2D and 3D imagers.
STEVE ZHU, TELEDYNE DALSA INC.
The use of both 3D-imaging technology and smart cameras is expanding the flexibility and capabilities of machine vision systems. Integrating these elements with advanced image preprocessing and intelligent software can further enable automated inspection applications that were once challenging or impossible to automate.

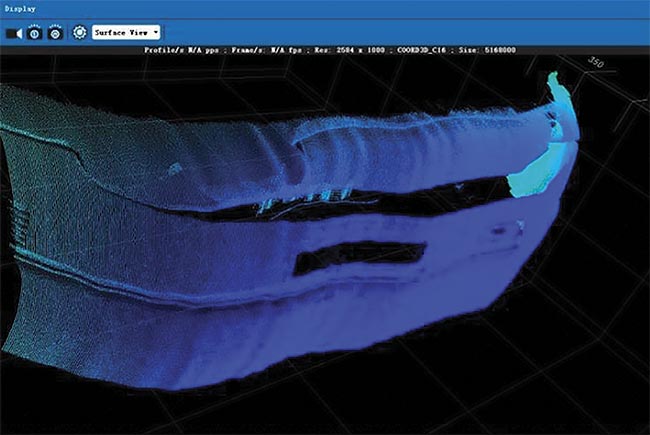
A toilet seat is inspected by using 3D imaging for real-time height measurements to check whether the cover is well balanced. Courtesy of Teledyne DALSA.
These advancements are ensuring higher-quality products, less waste, and lower costs. By catching defects early in the manufacturing process, components can be rejected or fixed before final product assembly, saving time and money.
The benefits of combining 2D and 3D imaging with more sophisticated image processing algorithms are made evident via three real-world applications that each required a dual approach to be performed more effectively. The first application described below involved the automated inspection and manufacture of toilets, a complex product to inspect given its materials and shape. The second application, the robotic handling and inspection of automotive disc brakes, took several
attempts to automate and involved
exploring various solutions. The third
example, the inspection of lithium battery
paper used to make automotive batteries,
required enhancing both speed and
precision.
Speeding inspection
Toilet production is surprisingly complex and the process is difficult to automate. The curvature of porcelain and ceramic toilet bowls presents a completely unique set of quality-control challenges due to the inherent reflectivity of the materials used. Even the basics — the tank, bowl, jetway, and trapway — are detailed components that need to be inspected at every step of the process. Additionally, designers are finding ways to add more features such as heated seats, integrated bidets, and dual flushing systems for luxury toilet brands, creating more complexity during manufacturing.
Using human assembly, it takes up to 20 people to assemble and inspect a standard toilet because quality checks occur at several points during the manufacturing process. The entire manual assembly and inspection process takes 5 to 6 min to complete.
If defects are detected during the final visual inspection, production may take even longer. If the left side sits a little higher than the right, then adding one more washer on the right side is necessary to make the sides even. This small correction adds another 5 to 6 min to manual production.
On one representative production line, 20 cameras were used to automate inspection tasks and robotic functions. The bulk of these imagers were smart cameras that validated quality, located parts, confirmed label placement, or guided robotic pick-and-place actions.

A high level of precision is required to place and balance the disc brake on a coating rod. Courtesy of Teledyne DALSA.
Such robotic systems rely on machine vision to identify the precise coordinates of a hole and guide the end-of-arm tool to place a screw in the hole. Additional cameras subsequently confirm correct placement.
A 3D camera that leveraged laser triangulation performed the final inspection with help from a software platform that was able to apply both 2D and 3D algorithms to image data. The software converted data from the camera’s 3D point cloud into 2D image data to apply conventional image preprocessing and perform pattern matching or edge finding more easily. The 2D image data also helped guide the robot into the right position before the camera’s 3D capabilities verified that all parts were correctly placed and aligned when viewed from the top and sides of the toilet. The camera also confirmed that every screw and label was in the right place and checked for gaps between the cover and the bowl and between the bowl and the floor.

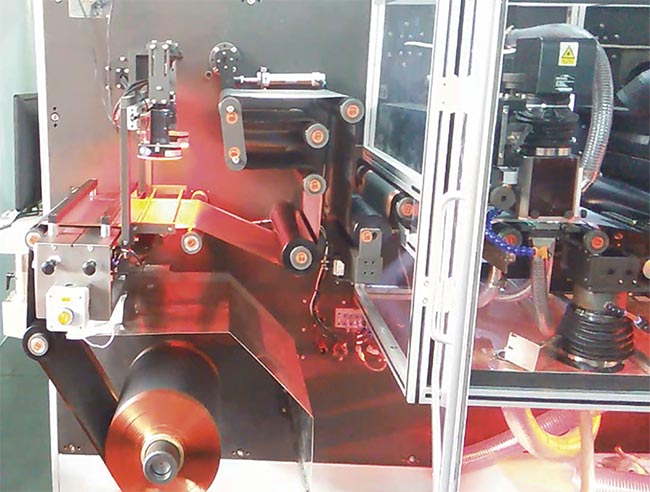
Using a line-scan camera and highly intelligent software, lithium battery paper is inspected to detect small imperfections such as dirt, scratches, or foreign substances that could lead to a volatile reaction in the finished battery. Courtesy of Teledyne DALSA.
The combined use of conventional and 3D machine vision was instrumental to automating this production line and, in turn, to achieving automation’s significant benefits in terms of time, labor costs, and increased quality.
With automation, it now takes 65 s to assemble a toilet on this line instead of 5 to 6 min or more, and it takes three people to run the line instead of 20. In addition, automation is inherently more accurate and repeatable, producing a higher-quality product.
Fewer flying discs
The combination of 2D and 3D imaging also improved production efficiencies through automation in a second application involving automotive disc brakes. The discs used are commonly coated with an anticorrosive material, such as zinc or a polymer, that helps improve performance and prolong the life of the brake.
During production, before the addition of automation, discs arrive in 1-sq-m bins. Workers manually transfer each disc from the bin and place it onto a conveyor belt. Further down the line, another worker lifts individual discs off the belt and
balances them on a rod in a coating chamber. The rod spins to ensure even distribution of the coating. Most chambers have glass windows or glass doors for observation.
Once the coating process is complete, a worker lifts each disc off the rod onto another conveyor belt where the disc continues on to brake assembly. When performed manually, 200 discs can be coated during an 8-hr shift.
The average disc specified for a regular sedan typically weighs around 9.5 kg or 21 lbs, which can contribute to worker fatigue, personal injury from dropped discs, or back strain from incorrect handling.
As a highly repeatable process, however, this is an ideal application for automation — though not an easy one to implement. The biggest challenge is accurately positioning and balancing discs on the rod. If not precisely balanced, a disc may fly off the rod and damage the coating chamber, including glass doors and windows. If this happens, it shuts down the assembly line and requires expensive repairs.
It took seven attempts by different vendors to figure out how to enable an automated process to precisely position
the discs on the coating rods so that they would not damage the chamber.
The successful solution applied 2D and 3D cameras at two stages. Here, 3D imaging profiled the discs stacked inside a container on a pallet to help guide a robot arm to transfer them onto a moving conveyor. The 3D profiler was customized to be mounted about 2.5 m away to capture a broad field of view that encompassed the bin.
Information from the initial inspection, used in conjunction with images from a 2D camera, guided a second robot to pick up the disc and place it on a rod in the coating chamber. The 2D camera was mounted outside of the chamber and used software to calibrate for the tilting effect caused by the angle between the camera and the rod inside. The software corrected for the disc orientation in the image to ensure it was perfectly perpendicular to the standing rod before being placed.
Otherwise, the robot could mistakenly place the disc only halfway on, which would certainly result in an accident.

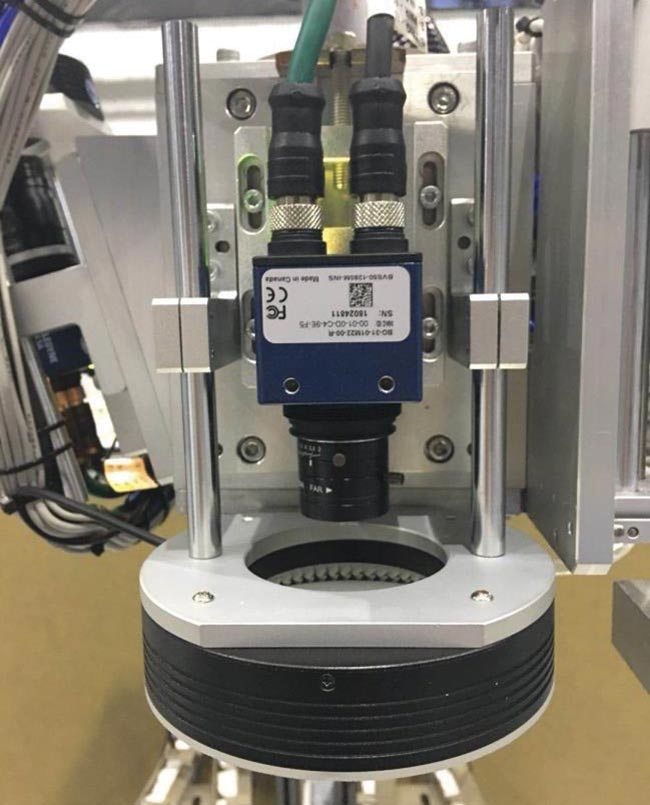
A smart camera enables smart manufacturing
in a robotic pick-and-place application. Courtesy of Teledyne DALSA.
Once the coating was completed, a robotic arm disengaged the disc from the rod, and the disc continued in the manufacturing process.
The result: Automation doubled capacity from 200 to 400 discs per day, with more precision and reliability, and risks
to worker safety were reduced.
Minimizing volatile defects
A third application relies on extensive preprocessing and leading-edge algorithms in machine vision software to enable precision inspection of lithium-ion battery components used in modern electric vehicles.
Lithium batteries are layered structures made up of battery cells that include electrode sheets, also known as lithium paper. Lithium paper is composed of several sheets of material that are layered like a lasagna, including separators and collector foils, such as aluminum for the cathode side and copper for the anode side. To produce lithium paper, separators and foils are stacked in the following sequence: separator/anode/separator/cathode/separator. The finished paper ranges between 100 and 400 mm in width.
Any imperfection such as dirt, scratches, foreign substances, bright or dark spots, or defects in cathode/anode tab integrity could cause an explosive foil, creating a safety hazard.
Quality control of the lithium paper is critical and typically takes the approach of performing a web inspection of a continuous roll of material. Consequently,
the application called for line scan cameras and highly intelligent software
combined with extensive image preprocessors to eliminate background noise and color.
Either 4K or 8K line-scan cameras
offer possible solutions, depending on the production line speed and level of inspection accuracy required. A 4K camera with a 26-KHz line rate, for example, can inspect 400-mm-width paper at speeds over 150 m per minute and accurately inspect anode and cathode tabs for defects measuring 0.01 mm in size. An 8K line-scan camera would double the accuracy of the 4K imager but operate at half the speed.
In practice, automating inspection is not always a straightforward calculation based on hardware specifications. Advanced calibration tools can help correct for linear, nonlinear, and perspective image distortion, and cutting-edge software algorithms can eliminate or minimize unwanted noise in the image to highlight important patterns, features, or edges.
Humans can inspect 15 m of lithium paper per minute but cannot consistently identify all defects. Once the process is automated using 4K and 8K line-scan cameras, 60 to 150 m of lithium paper are inspected per minute, improving productivity by as much as 400% to 800% and driving down the costs of emerging green technology.
Future programmed
These real-world applications demonstrate how combining the use of various imaging, processing, and software technologies together can enable higher levels of performance than each technology can alone. Consistent benefits are higher quality, reduced costs, and increased speed.
The integration of 2D and 3D data sets into a single software platform was instrumental to automating these processes and will continue to become a fundamental feature of machine vision software.
Technology provides the tools for automation, but software makes the tools work more effectively together.
Meet the author
Steve Zhu is director of sales for Asia for Teledyne DALSA Inc. He has worked with the company for 16 years. Zhu has a Bachelor of Science degree in computer science from Xiamen University, an MBA from École Supérieure de Commerce et de Gestion, and he completed the Advanced Executive Management Program at McGill University; email: [email protected].