The FlashPhase software-based technique for interferometric data analysis offers cost and performance benefits. Comparisons are made between its measurement results and those of the phase-shift method with 2-, 4-, 6- and 12-in.-aperture Fizeau interferometers.
Dr. Emmanuel Rabinovich, CVI Laser LLC, and Barbara Carr, Zygo Corp.
Interferometers have been conventional tools for the optical industry and for optical engineering and research for at least three decades. They are used in optical metrology, in the semiconductor industry, for military applications, for laser design and fabrication, for the design of astronomy-related optics and in many other academic and industrial fields.
A few traditional methods are used for the analysis of interferometric data. Two of the most popular are static fringe interpretation and mechanical phase-shift acquisition and analysis. Both are suitable for use with instruments that have apertures of various sizes, including those larger than 6 in. in diameter.
The phase-shift method is far more accurate and advanced than the static fringe visual technique, but it can become cost-prohibitive as the size of the aperture increases. The three most expensive components of a phase-shift interferometric system are the interferometer mainframe, the phase-measuring receptacle and the beam expander. The price of the phase-measuring receptacle rises rapidly with the aperture size of the system and may account for a large portion of the system’s total cost. Thus, the price of an interferometric system typically is closely related to the aperture size. The price of a phase-measuring receptacle for a 12-in. aperture, for instance, may exceed 30 percent of the total expense.
The FlashPhase software-based static fringe analysis method from Zygo Corp. of Middlefield, Conn., does not require a phase-measuring receptacle, saving the user money while continuing to offer good measurement accuracy. Operating within the company’s MetroPro software package, it also acquires surface data in harsh environments that may be too noisy for a conventional phase-shift system.
The method requires the introduction of tilt to the interferometer cavity. The interference picture with tilt consists of many interference fringes, forming an almost periodic intensity distribution. The software uses a common carrier fringe technique that applies a Fourier transform to the intensity distribution and switches to the spatial frequency domain with a first-order frequency inversely proportional to the intensity period in the interference picture.
The spatial frequency analysis separates the first-order frequency components and reconstructs an image ofthe higher-order frequency components of the surface under test or of the wavefront topography. Thus, unlike the phase-shift method, FlashPhase analysis does not require a change in the cavity length during a measurement run, eliminating the need for a phase-measuring receptacle. The need to record only one frame of the interference picture results in fast acquisition that is much less sensitive to environmental perturbations, acoustics or other vibration than is phase-shift interferometry.
Experimental comparison
To demonstrate their relative performance, measurements were performed on flat optics using the FlashPhase and phase-shift methods with 2-, 4-, 6- and 12-in.-aperture Fizeau systems. To effect proper metrology with the FlashPhase approach, tilt-induced errors were quantified at the outset of the measurement session. Taking advantage of built-in correction software supporting FlashPhase, a series of baseline measurements were acquired in situ with the flat under test. A resultant compensation file was applied to subsequent measurements of a part, accounting for the magnitude of the tilt in place for any given measurement.

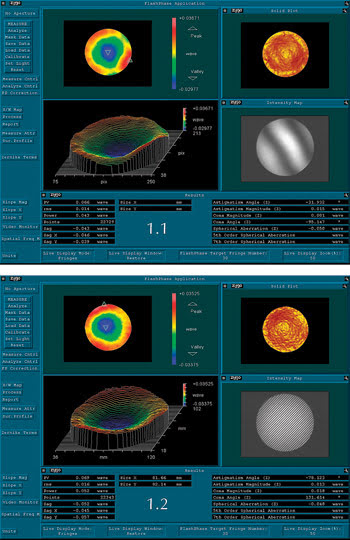
Figure 1. Surface flatness measurements were performed on a 4-in. flat optical substrate. The results obtained using the phase-shift method are shown above, and those obtained using the FlashPhase software-based static fringe analysis method are displayed below.
The interferograms are easily differentiated in Figure 1. For the FlashPhase technique, the interferogram of the 4-in. flat optical substrate consists of more than 30 fringes; for the phase-shift method, only a few. The reconstructed image of the surface under test is similar for both methods. The peak-to-valley difference and the root mean square deviation for the surface, respectively, were 0.066λ and 0.014λ for phase-shift and 0.069λ and 0.016λ for FlashPhase.
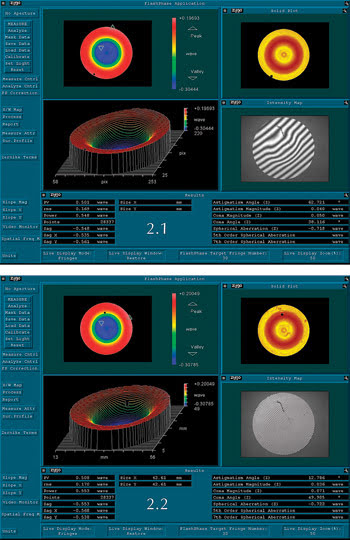
Similar correlation between the methods is observed for a 2-in. flat part with a defect in the middle (Figure 2). The results in this case offered peak to valley of 0.501λ and root mean square of 0.169λ for phase shift, and 0.508λ and 0.170λ, respectively, for FlashPhase.

Figure 2. For surface flatness measurements performed on a 2-in. flat optical substrate with a defect in the middle, the results obtained using the phase-shift method are pictured above, and those obtained using FlashPhase are shown below.
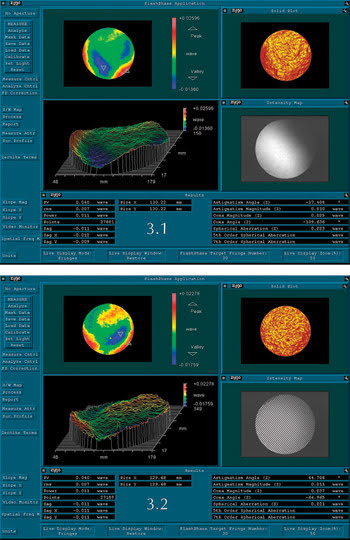
The results for a 6-in. part offered respective peak to valley and root mean square of 0.04λ and 0.007λ for phase shift and 0.04λ and 0.007λ for FlashPhase (Figure 3).
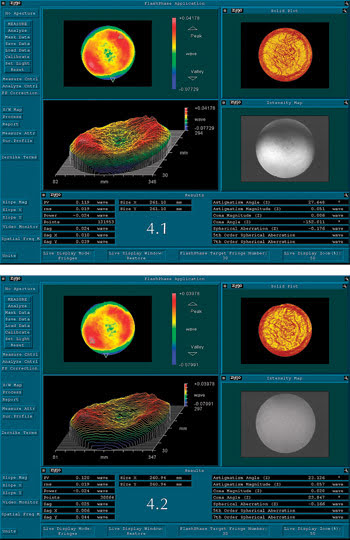
For a 12-in. part, the topography of the surface under test reconstructed with both methods again is similar, with respective peak to valley and root mean square of 0.119λ and 0.019λ for phase shift and 0.120λ and 0.019λ for FlashPhase (Figure 4).
Based on the results, FlashPhase acquisition and analysis software proves a viable alternative to mechanical phase-shift interferometry that does not compromise the measurement accuracy of large-aperture systems.

Figure 3. For surface flatness measurements performed on a 6-in. flat optical substrate, the results obtained using the phase-shift method are seen above, and those obtained using FlashPhase are displayed below.

Figure 4. For surface flatness measurements performed on a 12-in. flat optical substrate, the results obtained using the phase-shift method are shown above, and those obtained using FlashPhase are shown below.
Meet the authors
Dr. Emmanuel Rabinovich is chief metrology engineer at CVI Laser LLC in Albuquerque, N.M.; e-mail: [email protected].
Barbara Carr is product specialist at Zygo Corp. in Middlefield, Conn.; e-mail: [email protected].