Full company details
MKS Ophir
Unit of MKS Instruments Inc.
Light & Measurement
 3050 North 300 West
North Logan, UT 84341
United States
Phone: +1 435-753-3729
Fax: +1 435-753-5231
Toll-free: +1 866-755-5499
Beam Profiling: What Is Your Laser Not Telling You?
Photonics Spectra
Jun 2021Laser beam profiling instrumentation has come a long way over the past few decades. It is helping to ensure quality system builds and to avoid poor outcomes in materials processing applications.KEVIN D. KIRKHAM, MKS/OPHIR
While it may seem intuitive that turning up the power on a laser will produce faster results in a materials processing operation, beam measurement tools often reveal that this only distributes the laser’s energy over a larger area, resulting in a lower irradiance (energy per unit area) on target. Today’s beam profiling instrumentation allows end users to tune their laser processes to achieve a precise irradiance that is intense enough for the task, but not so intense that a weld, for example, overheats and renders less optimal results.

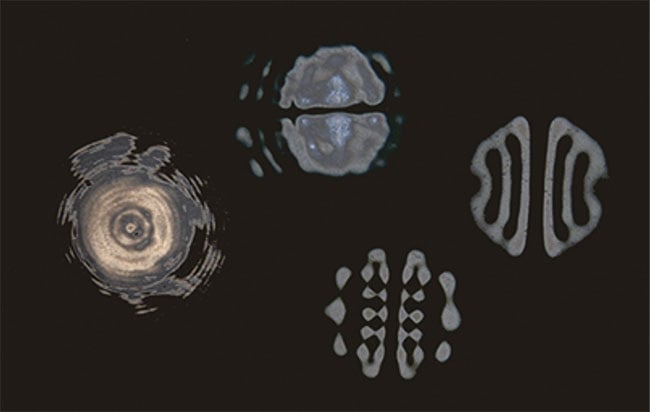
Early laser beam measurement tools relied on burn paper, which provided a rough order of magnitude for beam size but lacked quantitative data and details about hot spots or holes in the beam caused by misalignment of the laser cavity. Courtesy of Kentek.
It was not always possible to quickly and easily assess the beam quality of a laser processing tool. At one time, laser operators relied on tongue depressors, orange peels, or just the wall at the end of the bench to observe and measure the laser’s cross-sectional energy distribution or beam profile. Razor blades were even used to measure the intensity of some prototyped pulsed lasers. Beams were compared in “Gillettes,” which signified
the number of blades that the energy from a pulsed laser could penetrate. Later, devices such as meat thermometers and power pucks found use, even though their readings often provided only a ballpark estimate, lacking the precision and ease
of use seen in today’s measurement devices.
The evolution of light-based applications has been both enabled and inhibited by the availability of appropriate and accurate measurement systems. Many advancements in laser applications have been propelled by a concurrent growth in the technologies used to measure their applied properties.
From initial laser beam measurement products that were all about convenience, to clever, innovative products that became the basis for today’s carefully engineered laser measurement solutions — the technology evolved to solve the challenges of measuring laser parameters that were critical to the success of early laser applications.
Power meters and beam profilers
Most laser users today are familiar with power meters, which use semiconductor or thermopile sensors to measure laser intensities from a few femtowatts to hundreds of kilowatts. Users of high-energy pulsed lasers employ pyroelectric or semiconductor sensors to measure the energy contained in each pulse. Commercial laser energy sensors capable of measuring microjoule to kilojoule pulses can quantify single-shot to hundreds-of-kilohertz-pulse frequencies without interruption.
A laser’s cross-sectional intensity distribution, or beam profile, is another important parameter that is frequently measured. Beam profiles can provide visual indications of a misaligned cavity or delivery optics, degrading or misaligned focusing optics, and other issues affecting the delivered laser energy. Beam profiling products offer numerical analysis of a beam’s intensity, size, location, and radial symmetry — or top-hat uniformity. Statistical analysis of this data can be used to monitor operational parameters, look for manufacturing anomalies or trends, and document the consistency of the process parameters.
Scanning aperture-based sensors are also used to profile laser beams. These devices build up the beam profile over a short time as a very thin slit or microscopic pinhole is translated through the beam. Aperture-based sensors require very little, if any, optical attenuation because only a minute fraction of the laser light is transmitted through the aperture to the single-element detector.
Camera-based systems require many orders of magnitude more optical attenuation because camera sensors can saturate at irradiance levels as low as 1.0 µW/cm
2. Optical attenuators for laser beam profiling can safely provide as much as 16 orders of magnitude optical attenuation with very little distortion to the incident beam. Careful engineering and material selection are required for the successful execution of optical attenuation. High-performance materials, such as laser-grade fused silica — with very low contamination, high transparency, excellent optical surface quality, and flatness — provide some of the attributes necessary for successful multikilowatt, laser beam sampling systems.
Profiling profilers
Pyroelectric and silicon line array detectors, as well as scanning aperture products, were used by early laser innovators to monitor the intensity profile of their invisible laser beams. Initial camera-based beam profilers included analog CID (charge-injection device) and CCD sensors, or, for the NIR, vidicon cameras with a lead sulfide photoelectric cathode. Low-resolution pyroelectric matrix arrays were used to characterize laser beams operating within the short- to longwave IR range, as these arrays were the only devices available to detect those wavelengths.

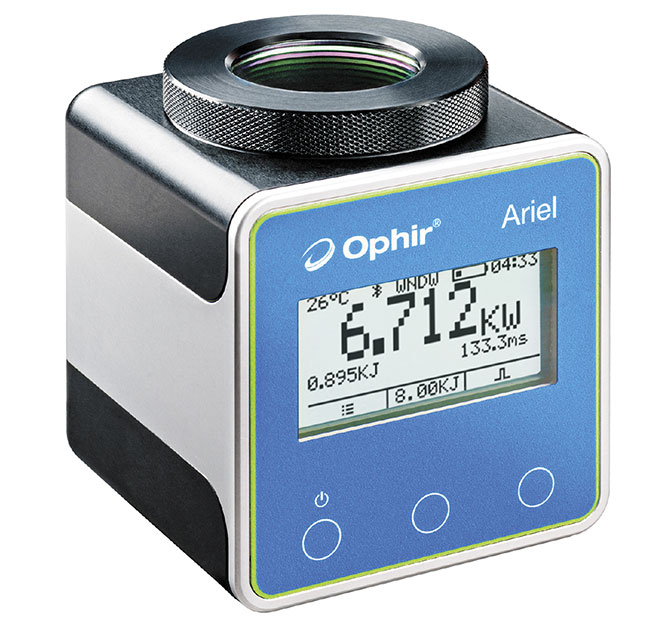
Uncooled laser power measurement systems bring convenient intensity measurements to the job floor, and even to small, constrained spaces, such as within additive manufacturing systems. Courtesy of MKS/Ophir.
Today, the 8-bit analog cameras of the 1980s have been updated with 12- and 14-bit megapixel versions that feature tremendous dynamic range and spatial resolution. High-resolution InGaAs camera profile beams in the shortwave IR (SWIR) spectrum, and pyroelectric and microbolometer cameras, are widely used to monitor MWIR and LWIR lasers. Camera connectivity has also increased significantly as analog interfaces have been replaced. Instead, high-resolution images are digitized in the camera and sent over high-speed USB 3.0 or Gigabit Ethernet cables to a beam analysis application installed on a laptop, PC, or smartphone.

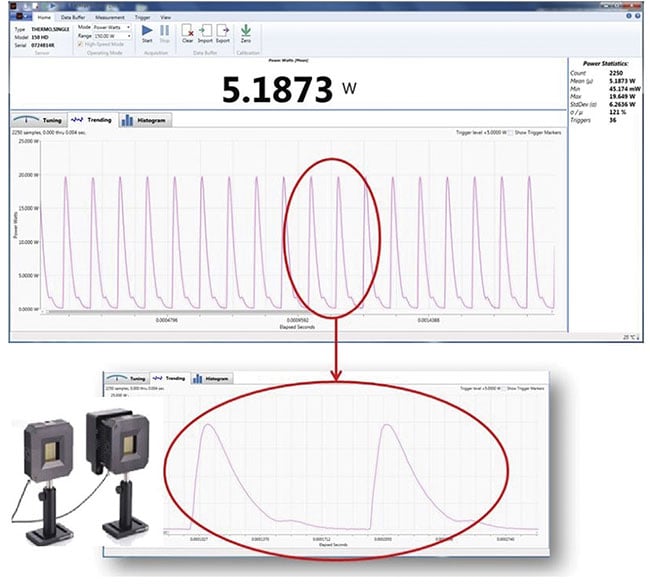
Today’s laser measurement systems can measure femtowatts to hundreds of kilowatts, and picojoules to hundreds of joules. Courtesy of Coherent.
Second-generation scanning aperture sensors come with a wide variety of options that provide complete coverage of the laser spectrum, from the UV to LWIR. Scanning slit and scanning pinhole systems require little, if any, optical attenuation of the laser beam, making them very convenient for industrial applications in which high levels of laser irradiance are common. Due to the use of specialized materials, scanning aperture and camera-based beam profiling products can now monitor the focused region of multikilowatt-power fiber and disk lasers without risk of damaging the sensor or beam sampling optics.
Power measurement today
An uncooled laser power measurement system for continuous-wave or pulsed lasers makes monitoring of beam intensity conveniently available on the job floor. Current systems, such as Ophir’s Ariel instrument, can profile power outputs up to 8000 W, without the need for water cooling, to measure unfocused beams at typical processing power densities. Applications for such instruments include profiling the power and energy of lasers used for additive manufacturing, as well as for cutting, welding, heat treating, and other materials processing operations.

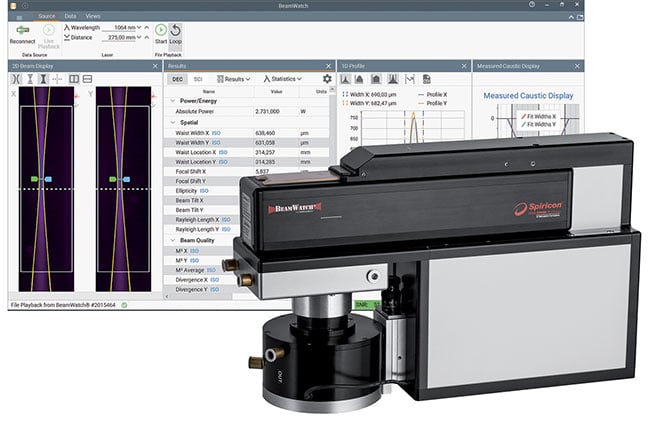
Noncontact laser analyzers can monitor the complete focus region caustic and the laser’s power simultaneously. Courtesy of MKS/Ophir.
The high-speed, thin-film, pyroelectric sensor family from Coherent’s PowerMax-Pro further illustrates how beam profiling has migrated from the lab to the job floor. The technology provides calibrated power sensing and pulse-shape monitoring with microsecond rise times for MWIR and FWIR lasers used for high-finesse micromachining and materials processing applications, such as plastic welding and glass scribing.
Noncontact measurement
Multikilowatt fiber and disk lasers used for assembling fuel cells and for welding battery components can now be monitored by noncontact beam profiling systems. These integrated systems find the focal plane — the location along the propagation axis of the smallest spot size — and, based on the total power in the beam, derive an irradiance distribution profile location where the laser energy is applied. Critical operational parameters — such as focal shift or changes in the location of the waist, depth of focus, beam size, power, and irradiance at the work plane — are all indications of the laser system’s performance. Proper irradiance at the work surface of a powder bed is a particularly key indicator of a successful build for additive manufacturing applications. Current measurement solutions also store data, allowing all the performance parameters listed to be compared to previous performance profiles.
Noncontact laser analyzers can monitor the complete focus region, the beam caustic, and the laser’s power simultaneously. Images obtained from these measurements define the irradiance profile that is available to the laser process. Measuring laser parameters before and after each process may slow the process slightly, but it ensures that the correct energy/irradiance is being applied to the part to produce the desired process result. Failure to accurately monitor parameters — such as laser power, energy, and irradiance at the workpiece — risks wasting valuable materials and processing time. In addition, it exposes the process to out-of-spec conditions that may render more scrap and degrade the process to the point where it negatively affects the end product’s lifetime.
What’s next?
For decades, laser technology has depended on measurement systems and techniques to enable the growth of applications and help to improve both the performance and products of laser-based endeavors.
Modern applications of industrial lasers directly benefit from measurement technologies, and continued adoption of laser tools depends on the high-fidelity analysis of critical laser parameters such as output power or energy, irradiance at the workpiece, focal plane location, and the stability of the beam.
Ingenuity has always played a part in the development of laser measurement tools, and current monitoring technologies are poised to help deliver the next revolution in laser materials processing. Any laser-based endeavor will benefit from a greater understanding of the laser’s performance.
In the future, the monitoring of laser system performance may become standard practice to maintain an ongoing record of correct irradiance for process monitoring purposes. A clear profile of the optimal beam applied to a process will help to isolate or vindicate the laser as the culprit should the process degrade. But it can also help to ensure the success of high value-added laser processing operations by verifying that the process is stable and repeatable, and that it is sustaining conditions that previously produced quality products.
New technologies and measurement techniques will no doubt come along to enable new revolutions in laser processing and critical new applications of light.
What’s next? More advanced sensor
technologies — such as cameras with smaller pixels, larger sensors, and expanded wavelength coverage — can be expected to become more widely employed as their costs recede. Compact laser beam sampling optics will enable at-line and on-line beam analysis. And noncontact methods will increase in use.
In the end, it is easier to measure laser parameters before and during processes,
to fix issues as they occur, rather than
to rework or scrap products built with
inadequate knowledge of process variables.
The performance of high-power laser systems may now be easily monitored. Fast, uncooled power sensors and noncontact beam profiling tools make characterization easy and cost-effective. Early laser pioneers realized the need for accurate, repeatable measurements. Can you afford not to know your laser?
Meet the author
Kevin D. Kirkham is senior manager for new business development for Ophir at MKS Instruments. He has over 30 years of experience in laser diagnostics and quality assessment. Prior to working at MKS, he was product manager at Coherent Inc. and regional sales manager at Molectron Detector; email:
[email protected].