The shrinking dimensions of display components means that critical defects are also getting smaller and harder to spot.
As product and manufacturing specifications tighten, imaging for industrial quality control (QC) faces challenges. For one thing, the tolerances that parts must be inspected to are more exacting. For another, specifications for layer composition, subsurface features, surface roughness and other characteristics also are more stringent. At the same time, required throughput often is increasing.
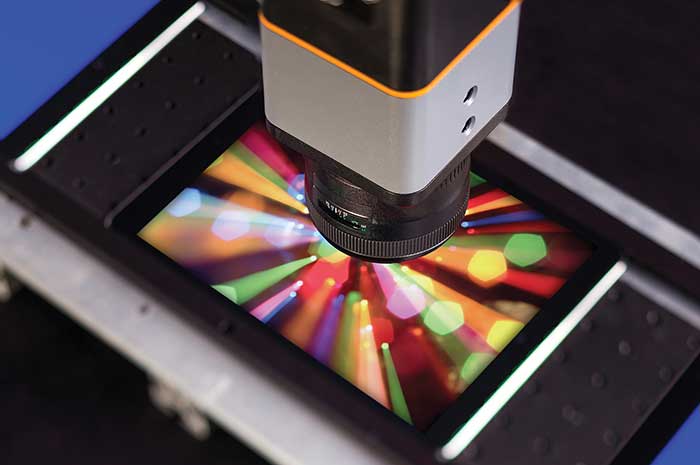
Imaging colorimeters measure light and color to evaluate the quality of illuminated displays in-line. Using high-resolution CCDs, these imaging systems capture an entire display in a single image and quickly apply software tools to enable real-time QC during production. Courtesy of Radiant Vision Systems.
Industry experts are turning to optical engineering as well as employing silicon advances and new architectures that boost performance to meet these challenges. They also are exploiting new wavelengths and other properties of light to reveal what before was difficult or impossible to see.
In Laval, Quebec, Canada, Synergx Technologies Inc. is using a combination of techniques to produce automated optical inspection equipment for the glass industry. In the case of the tens of millions of car windshields manufactured annually, the goal is to catch chips, scratches, bubbles and other defects that measure less than 300 microns, with complete inspection of an entire glass surface taking less than two seconds.
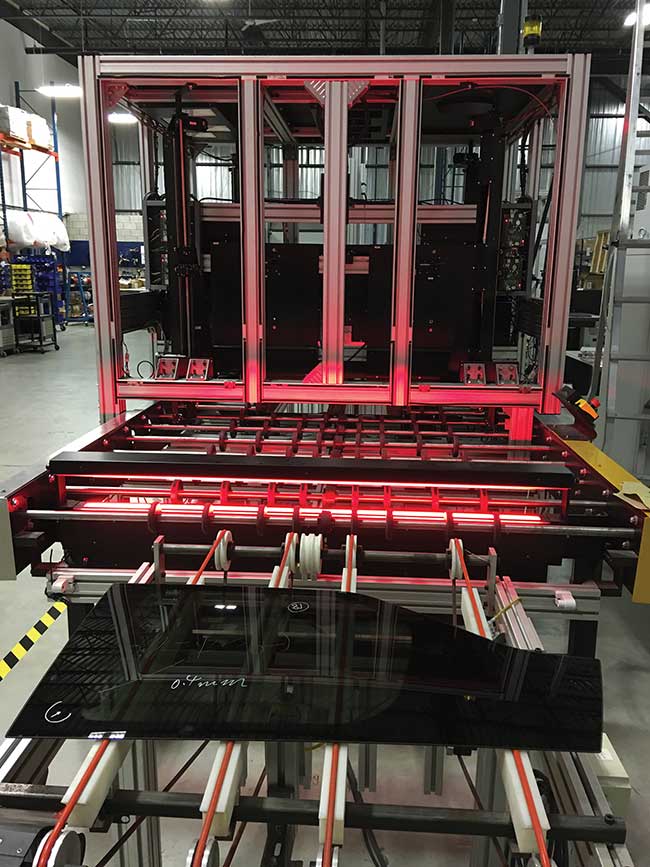
Optical engineering enables rapid inspection of large pieces of glass for small defects. Courtesy of Synergx.
“We have a proprietary optical element, lighting system and algorithm to combine multiple levels of focus range images into a full 100- or 200-millimeter-deep single focused image,” said Stéphane Baldo, chief technology officer. Because windshields are becoming curvier, he added, the company will soon have to increase its imaging depth of field to 300 mm, without sacrificing cycle time or defect-detection capabilities.
Synergx uses cameras from Teledyne Dalsa Inc. The company, which is based in Waterloo, Ontario, Canada, provides products to many QC imaging systems and is a leading supplier to producers of inspection systems for flat panel displays, said Xing-Fei He, senior product manager.
The shrinking dimensions of display components means that critical defects are also getting smaller and harder to spot, said He. Widely available commercial high-resolution displays have a pixel size of 60 to 80 microns, with each of these composed of three primary color subpixels. An inspection system must catch defects that are significantly smaller than the size of pixels.
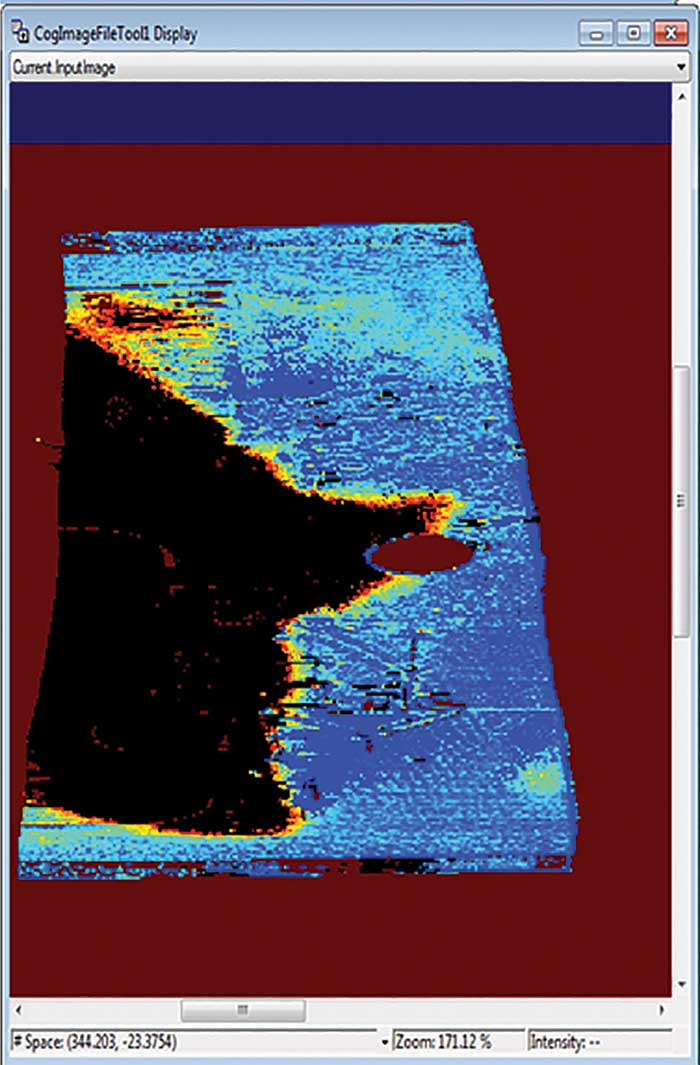
A seal has multiple bubbles, including one that breaches air tightness and is a defect. Courtesy of PFM Integrators.
Traditionally, detection via imaging has been based on intensity, said He. A more sophisticated and alternative approach is detection by wavelength. This works for defects that interact more strongly with specific colors such as red, green, blue or perhaps the near-infrared. Shorter wavelengths, for example, may reveal details about the surface of a printed circuit board under inspection while NIR enables imaging underlying layers and associated defects.
Combining these different bands can yield additional information and make quality control imaging more effective in capturing miniscule defects as well as in meeting other inspection standards.
Polarization is another property of light that can produce valuable quality control data based on phase detection, said He. Material attributes that can change polarization include stress inside a layer and surface roughness.
“You can actually detect the thickness of a film, a transparent thin film,” said He. “You cannot see that with conventional technology because it’s transparent.” He predicted that because of such capabilities, polarization imaging will increasingly be part of the standard QC toolkit.
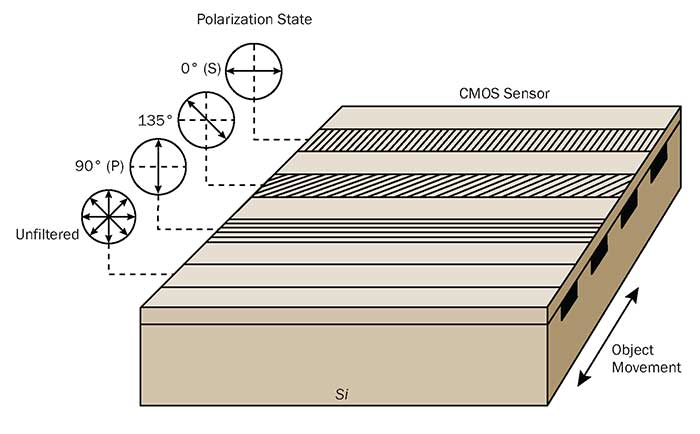
Polarization sensors can allow QC inspection of features that are not possible by traditional means, such as the thickness of transparent films. Courtesy of Teledyne Dalsa.
Advances in processing
Other innovations that could lead to better QC performance involve the use of multiple illumination approaches, such as bright-field, dark-field and backlight. These highlight defects differently and make inspection more productive. Combining these different techniques has been avoided because each required its own pass, slowing down the inspection process, said He. To address this problem, Teledyne Dalsa has developed a camera that uses different color channels for different lighting illumination, allowing single-pass scanning.
Such advances are possible, in part, because improvements in silicon have resulted in faster chips that benefit both image processing and automated decision-making. This increased capacity has been accompanied by growing expertise on how to best use it, said Brandon Treece, senior product marketing manager for data acquisition and control at National Instruments Inc. The Austin-based company supplies image processing software and hardware.
Some processors, such as CPUs, require that each operational step in an algorithm executes before the next can begin. On the other hand, Treece said, an FPGA, or field-programmable gate array, can execute the first operation on one pixel and immediately move to the next on that same pixel without waiting until the entire image has been processed. Partitioning an image-processing problem correctly to take advantage of the different strengths of the various processor options can thus boost performance.
Such chip improvements pay off when QC is done online as part of a go/no-go decision that marks a part as good or bad. However, processing advances also help when inspections are made offline as part of a post-manufacturing evaluation. The automated optical comparators made by Keyence Corp. of America, based in Elmwood, N.J., for instance, backlight a part and then can take hundreds of dimensions in second.
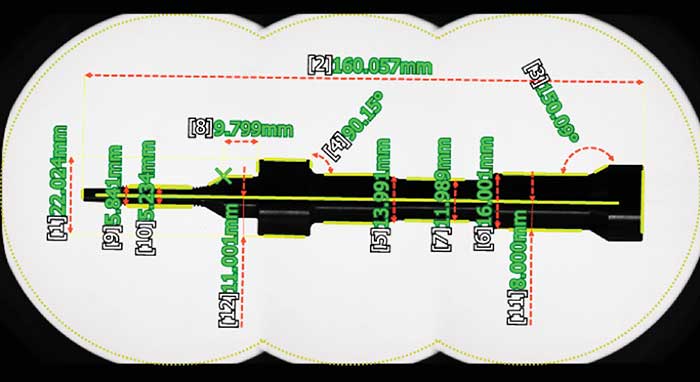
A turned part processed by a lathe can be inspected quickly and accurately using optical imaging. Courtesy of Keyence Corp.
“If you have a turned part, there’s probably lots of different diameters you would want to measure,” said Mo Brodeur, technical marketing engineer in the company’s Micro Analysis Group. A threaded part, for instance, potentially could be screened for its diameters as well as for pitch and thread angles. Likewise, a stamped part also could undergo quality checks related to dimensional tolerances.
According to Brodeur, better processing is part of what makes it possible to do more measurements in a shorter time than before.
Improving systems communication
Advances such as these have eliminated image processing as the bottleneck in inspection throughput, National Instruments’ Treece said. Consequently, the communication between the vision and motion control systems can become the holdup. One way to get around this is to use hardware that supports the IEEE 1588 precision time protocol standard. Synchronization between systems can drop from milliseconds to less than a microsecond, Treece said. That makes it feasible to stack steps instead of sequencing through them, saving time and boosting throughput.
Another way to solve the communication bottleneck and achieve desired results is a new architecture in which a high-performance vision system hosts everything. That was the option chosen by Master Machinery Corp. of New Taipei City, Taiwan, for its pick-and-place systems. These take a chip off a silicon wafer and put it into a package, with a quality control check along the way. Eliminating lag time and delays enabled the company’s machines to go from an industry-standard 2000 parts per hour to more than 20,000 parts per hour, Treece said.
Another example of an approach to improving QC that makes use of various techniques comes from Radiant Vision Systems in Redmond, Wash. The company makes automated visual test and inspection systems for displays and illuminated components.
Displays must be visually consistent and pixel-level defects that impact the color or intensity are important. For that reason, Radiant uses an imaging colorimeter that is designed to reproduce the average response of the human eye. Resolution of the systems can run as high as 29 megapixels, allowing small defects to be picked up across a wide field of view.
Most of the QC checks in display manufacturing are manual, said Eric Eisenberg, applications engineering manager. When done manually, the QC task requires rotating inspectors every few months because the job is so visually taxing. As many as a dozen human inspectors can be replaced by a single automated system, said Eisenberg. A machine vision system also has the added benefit of greater consistency.
There can be other advantages, he added. Some display makers can repair bad pixels if the precise coordinates of defects are known. As a result, an automated inspection system that accurately and reliably provides this information can up line yield and cut display cost.
“We’ve really reached a convergence of technologies where we have computer speed and we have software,” Eisenberg said. “We have imaging sensing technologies that have reached a point where we actually can be good enough to replicate what a human inspector can do and also make a decision based on those inputs.”
Despite the improvements in sensing technologies and processing speed, the pressure remains to develop QC imaging systems that can keep up with the demands of production. Kenneth Baych, president of PFM Integrators, a supplier of control systems and automation solutions in Chaska, Minn., said trimming inspection time is becoming more critical every day. However, it takes a certain amount of time to capture the image, process it and determine the outcome as either pass or fail.
“As production line speeds increase, the limiting factor is the amount of time given between items which need to be analyzed,” Baych said.
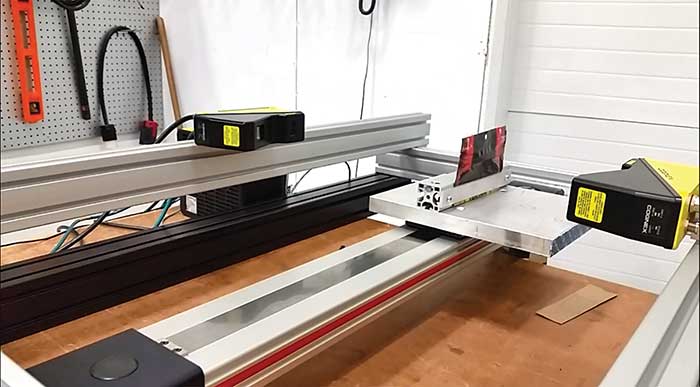
A 3D vision system inspects heat-sealed bags. Courtesy of PFM Integrators.
Typically customers want better than 99 percent consistency in marking a part as good or bad, he added. That determination can be impacted by factors outside the imaging system itself, such as lighting and part orientation.
3D scanning
These issues can be overcome through the application of optical engineering and associated techniques, Baych said. PFM, for example, was tasked with automating the inspection of heat-sealed food bags, with thickness variations in the seal possibly indicating integrity failure.
The company solved the problem by using two 3D cameras from Cognex Corp. of Natick, Mass. One measured the seal profile from one side, the other from the opposite view. Together, they provided information on the 0.25-mm-thick seal, which can have cosmetic 0.1-mm-deep voids and superficial 0.2-mm-high lumps. Such variation makes spotting actual defects a challenge. But if
the product is consistently made, the detection rate for problem seals is close to 100 percent with the dual-camera system, according to PFM.
Baych hopes that 3D scanning will follow the path of other QC imaging techniques. “When optical first came onto the market, the only applications which could justify the investment were highly critical high-cost applications,” he said. “As the investment cost continues to lower, the ROI [return on investment] becomes increasingly better for end
uses, not only for the highly critical application, but for more general-purpose ones.”
The ongoing reduction of the cost of QC imaging solutions is a reason for optimism. According to Baych, “That really opens the door for an explosion of potential applications.”