HOLLY O'DELL, CONTRIBUTING EDITOR
Many factors go into designing a quieter car, one of which is the alignment of gear teeth. The process starts when a spray station applies a marking compound, known as a rouge, to gears. The application of rouge is considered a necessary evil, as it provides the contrast for where the contact marks appear. But there is also a belief that the chemical makeup of most rouge could cause additional wear. Once rouge is consistently and evenly applied, the gear set is rolled, and it creates the contact or gear mesh pattern. An absence of rouge shows where it has been worn away. But changes of the pattern in shape, form, or coverage area can determine whether the gears produce a loud or quiet differential.
Ford Motor Co. previously relied on human inspectors to determine when the patterns were out of tolerance for its F-Series of trucks, but the automaker needed a system that could objectively determine errors within a certain tolerance. Removing subjectivity by digitally recording the contact pattern attributes also opened the door for tracking trend data, both of which provided cost savings. Ford reached out to machine vision integrator Radix Inc., a division of AIS Technologies Group Inc., which created a photogrammetric pattern reading system that defines gear tolerances for the desired specification to produce consistent, measurable results.

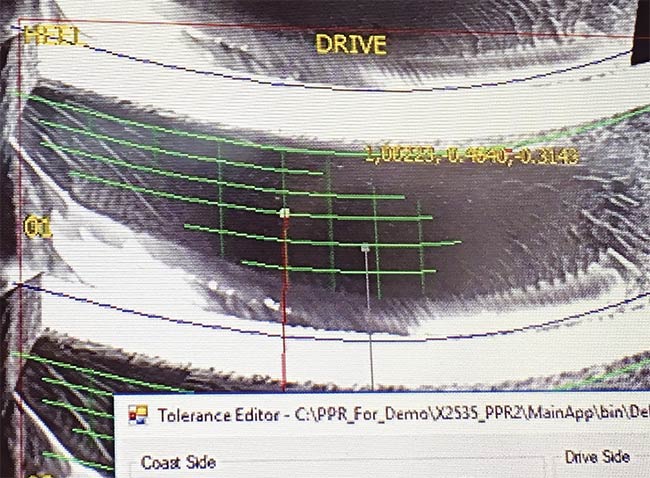
A GTAA output screen (partial image). Courtesy of Mike Martel.
Radix installed two line-scan cameras, accompanied by near-IR lighting, which take an average of three seconds to image the drive and coast sides of the gear set in motion. The company chose line-scan cameras because the cameras capture the entire set of teeth in motion rather than attempting to stitch together each tooth in a sequence of images. The vision system handles parts from 100 to 400 mm
in diameter, with accuracy down to
2 to 4 pixels.
Relying on advanced vision software, Radix’s Gear Tooth Alignment Analytics (GTAA) system looks at the individual teeth of the gear to define the contact area, centroid, length, and width, as well as sections of the area so the pattern shape can be quantified. This data enables customers to identify where and how they should be looking at the assembly and machining processes for potential improvement.

A Ford F-150.
“These factors affect not only the sound produced by the gears but also the wear characteristics,” said Shawn Horton, director of product management at AIS.
Once the vision software collects all of the tolerance information, it outputs variable data that can be used for statistical analysis. This capability allows the designer to identify deviation or other common problems and anticipate where they may occur. Trend data charts are also available in a CSV file output for offline viewing. If a gear set is out of specification, the PLC (programmable log controller) flags the problem and alerts the controls system, which decides whether the part requires a rework or needs to be pulled from the line. Once trained, the system functions without an operator.

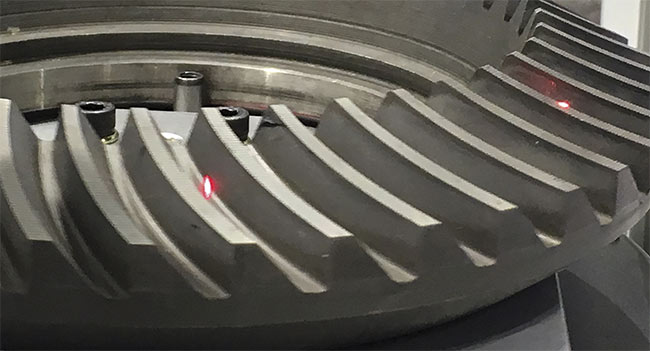
A typical hypoid bevel gear with rouge (after contact pattern). Courtesy of Mike Martel.
A major obstacle in evaluating the correct tolerance is the application of the rouge itself. “You need an automated system to apply consistent, even coating,” Horton said. “You also want to use a minimal amount of rouge because it contains titanium oxide, which engineers believe also contributes to wear in a gear set.”
By using machine vision and statistical process control, Radix achieves the optimal amount of rouge while effectively and consistently reviewing various tolerances of the gear teeth to ensure proper performance. In fact, Ford was so impressed with the system that the automaker created a YouTube video touting how the system produced a better axle and a quieter vehicle for the F-Series.