To simplify the process when purchasing flat optics, we will discuss the top six factors from a manufacturer’s perspective, all of which affect the three major areas of the purchasing decision: quality, delivery, and cost.
Michael Naselaris, Sydor Optics Inc.
Flat optics generally perform three main functions: They transmit light (windows), reflect light (mirrors), and fold light (prisms). While most optical manufacturers make spherical and flat optics, a smaller percentage focus specifically on making only flat optics.
Knowing the intended use of the optical component, shared by about half of all customers, helps the manufacturer to understand which specifications are the most critical to the optic’s performance, and to discuss specifications that might have been overlooked or overspecified, as they all could be cost and/or delivery drivers.
Common flat optical components used in the UV, visible, and IR spectrums include:
| |
• Debris shields |
|
• Reference surfaces |
| |
• Encoder disks |
|
• Reticles |
| |
• Filters |
|
• Substrates |
| |
• Gratings |
|
• Wafers |
| |
• Lightpipes |
|
• Wave plates |
| |
• Mirrors |
|
• Wedges |
| |
• Optical flats |
|
• Windows |
Optical materials
The first and foremost item to consider is the optical material. Important factors include homogeneity, stress birefringence, and bubbles; all of these affect product quality, performance, and pricing. Homogeneity plays a major role with transmissive optics. As homogeneity decreases, so does the optician’s ability to achieve the desired transmitted wavefront specification. Stress birefringence, on the other hand, affects the mechanical stability of optics requiring surface flatness. Bubbles could affect cosmetics if they break the surface during grinding and polishing stages.
Other relevant factors that can impact processing, yield, and pricing include chemical, mechanical, and thermal properties, along with the form of supply. Optical materials can vary in hardness, making manufacturability difficult and processing cycles possibly lengthy. The ideal optical materials for flat optics manufacturing are BK7, Borofloat, and fused silica. Other optical materials require careful handling and special processing techniques, as they can easily stain or may be sensitive to environmental changes, such as temperature and humidity.
Keep in mind that often, equivalent material types can be used interchangeably. Some engineers will document a specific material (e.g., Schott’s N-BK7), whereas others may state a preferred material and add the clause, or equivalent, to their specifications. Having this option may shorten lead times and even decrease pricing to some extent.
The following optical materials and their equivalents are popular for flat optics:
| |
• B270 |
|
• Silicon |
| |
• BK7 |
|
• Sapphire |
| |
• Borofloat® |
|
• ULE® |
| |
• Crystalline material, such as
CaF2, MgF2, BaF2 |
|
• Zerodur® |
| |
• Filter glass |
|
• Zinc selenide |
| |
• Fused quartz and fused silica |
|
• ZSinc sulfide |
| |
• Germanium |
|
|
Reflected wavefront vs. transmitted wavefront, or both
One issue requiring clarification in approximately one in four inquiries involves reflected wavefront and transmitted wavefront. Prints received are often vague enough to make one question the intent of the reflected wavefront, which is the accuracy of the surface with respect to a reference plane. Transmitted wavefront is the permissible wavefront deformation involving the surface flatness of both surfaces, the parallelism of the optic, and the homogeneity of the optical material. For the most part, flat optics require reflected wavefront or transmitted wavefront, with the primary exceptions being plate beamsplitters and prisms. Prints oftentimes state the word flatness, yet the function may be that of a window, thereby requiring transmitted wavefront as the ideal specification for optical performance. Mirrors, on the other hand, require reflected wavefront as the key indicator of performance in this respect. Head-up displays, for example, are plate beamsplitters and require both good optical transmission and optimal reflected wavefront for performance.
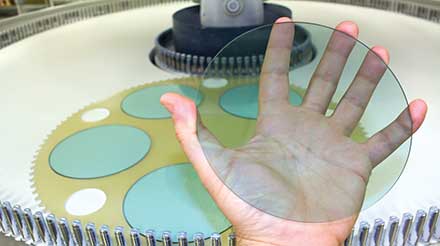
Filter glass on a double-sided machine.
The terms used for specifying reflected wavefront and transmitted wavefront are optical in nature — waves and fringes (half-wave) and lately more requests are in terms of nanometers — but on rare occasions, surface flatness may be specified as a mechanical callout in microns (0.001 mm). It is important to distinguish the difference between two commonly used specifications: peak to valley and rms. Peak to valley is the maximum measurement and the worst-case scenario, taking into account the difference between the surface’s lowest and highest points. It is by far the most widespread flatness specification used today. A more accurate measurement of surface flatness is rms, as it takes into account the entire optic and calculates deviation from the ideal form. Traditionally, optical flats have measured surface flatness in fringes; today, however, laser interferometers at 632.8 nm measure most optical components.
The clear aperture, also known as the usable aperture, is important. Normally optics are specified with an 85% clear aperture. For optics requiring larger clear apertures, attention must be taken during the production process to extend the performance area closer to the part’s edge, making it more difficult and costly to fabricate.
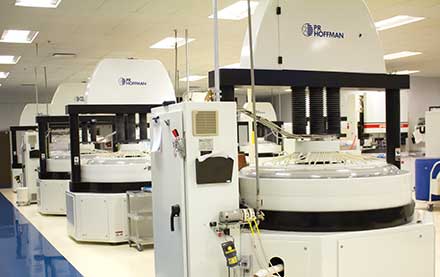
A large double-sided machine.
Parallel or wedged
Components such as filters, plate beamsplitters, wafers, and windows are required to be of very high parallelism, whereas prisms and wedges are intentionally wedged. The method of grinding and polishing plays an important role in the manufacturer’s ability to achieve the parallelism specs. For parts requiring
exceptional parallelism (<1 arc second) and transmitted wavefront (<1 wave), double-sided grinding and polishing is the best method to use. Parallelism can be
easily measured using an interferometer.
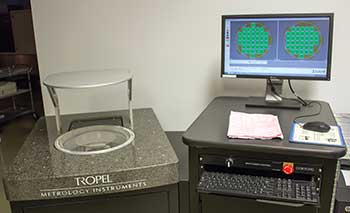
Tropel wafer interferometer.
Wedges and prisms require angled surfaces at demanding tolerances and are usually processed via a much slower process using pitch polishers. Pricing increases as angle tolerances become tighter. Wedge is specified in degrees, minutes, and seconds, and occasionally it will be stated as a thickness measurement at the parts’ thin edge, thick edge, or center. Wedge-angle tolerance of several arc seconds falls into the higher level of precision, whereas tolerances of minutes or degrees fall into the medium and looser levels of precision. Typically, an autocollimator, goniometer, or a coordinate measurement machine is used for wedge measurements.
Side view of a pitch polisher.
Dimensions and tolerances
Size, in conjunction with other specifications, will dictate the best processing method, along with the size of equipment to use. Although flat optics can be any shape, round optics seem to achieve the desired specifications more quickly and uniformly. Overly tightened size tolerances can be the result of a precision fit or simply an oversight; both have an adverse effect on pricing. Bevel specifications are at times overly tightened, also resulting in increased pricing.
Surface quality
Surface quality is influenced by cosmetics, also known as scratch-dig or surface imperfections, as well as surface roughness, both with documented and universally accepted standards. In the U.S., MIL-PRF-13830B is popular with an increasing use of ISO10110-7 or its American-based counterpart ANSI/OEOSC OP1.002.
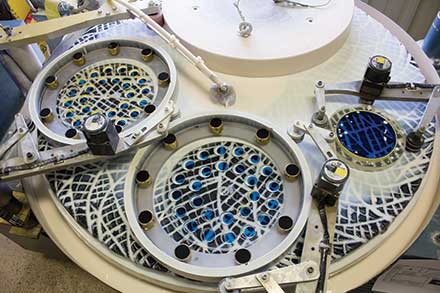
Top view of a pitch polisher.
Scratch-dig is represented with two numbers (e.g., 20-10) that generally fall into predetermined sets, such as 20-10, 40-20, 60-40, etc. The first number is arbitrary and denotes the scratch appearance, best matched to a calibrated standard. The second number refers to the dig size, which is designated in 0.01-mm increments. Scratch-dig values of 80-50 and above refer to commercial quality, 60-40 refers to general optics quality, and surface qualities of 20-10 and 10-5 are utilized more for laser optics and high-end optics applications. Lower numbers mean a higher level of precision and increased pricing. Keep in mind that, as the area of a part increases the difficulty, achieving a higher level of precision for scratch-dig increases difficulty at an even greater rate.
The inherent inspector-to-inspector and vendor-to-customer variability makes it difficult to correlate scratch-dig between them. While some companies try to
correlate with aspects of their customers’ inspection methods (i.e., lighting, viewing the part in reflection vs. transmission, distance, etc.), many more manufacturers avoid this pitfall by overinspecting their products by one and sometimes two levels of scratch-dig better than the customer has specified. Additionally, metrology that can objectively determine cosmetic thresholds for each of the existing cosmetic standards has become more prevalent and is taking the pre-existing subjectivity out of cosmetic evaluation.
Surface roughness refers to the overall texture of an optical surface and can influence the production process or the need for different or additional polishing steps to achieve lower surface roughness requirements, both having cost implications. Surface roughness generally falls into five categories: superpolishing (≤1 angstrom rms), high-precision laser grade (1 to 5 angstroms rms), standard optics (5 to 15 angstroms rms), commercial optics (15+ angstroms rms) and those with no specification. The detail to remember is that lower roughness equals higher price. Generally, surface roughness is measured with noncontact optical profilometers. One universal and often overlooked problem with roughness specifications is the omission of a measurement’s length.
Quantity
For the most part, the smaller the quantity, the higher the processing costs per piece and vice versa. Quantities too low may involve lot charges, as a group of components may need to be processed to properly fill and balance the machine to achieve the desired specifications. The goal is to maximize each production run to amortize processing costs over the largest quantity possible. Although the same optical component can be made using different processing methods, the dominant one is usually indicated by the quantities and specifications.
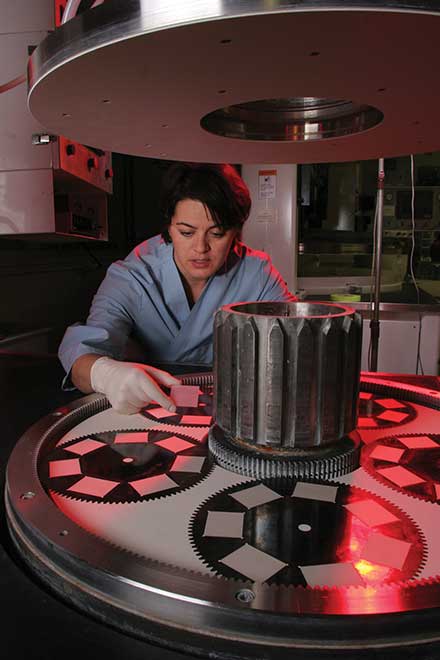
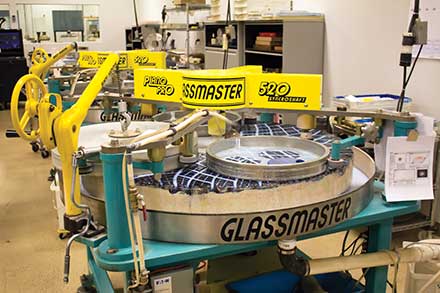
A small double-sided machine.
The most commonly used processes for flat optics involve double-sided polishing and single-sided polishing on pitch polishers. Double-sided grinding and polishing, a batch-type procedure, can process both faces of the optic simultaneously for parallel optics. Economical batch sizes are determined by the size of the optic and the machine size. Pitch polishing, however, is a more time-consuming process generally utilized for requirements specifying fractional wave surface flatness and/or improved surface roughness. Double-sided polishing is deterministic, involving hours, while pitch polishing may involve days for the same quantity of parts. If transmitted wavefront and/or total thickness variation are your primary specifications, double-sided polishing is best, whereas polishing on pitch polishers is ideal if reflected wavefront is of primary importance.
Trends
Over the past several years, we have observed a few trends regarding precision flat optics. More and more customers are making the assumption of quality, in turn making delivery more important than pricing for the most part. The assumption of quality needs to be substantiated with more questions to ensure that the proper metrology and levels of verification are used. Increasingly, the demand is for thinner and thinner optics, along with tighter surface flatness and higher levels of cleanliness.
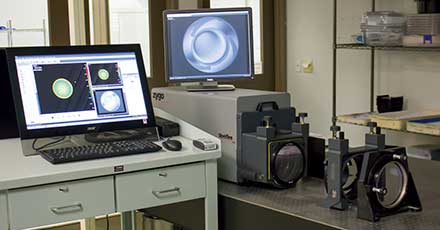
Zygo IR interferometer.
My recommendation would be to call your optics vendor. Share more information up front in the quoting process and be open to suggestions, as your vendor may point out key cost, delivery, and quality drivers. This will yield the most effective and accurate quotation, as compared to just sending an email.